NIKIMAT


Amel Super Maramu 2000
|
Lofrans Tigres Windlass Overhaul Part 2: 17 Pictures from 8 to 24 Unbolting the windlass from the deck (and complications), protecting electric wires, removing the oil |
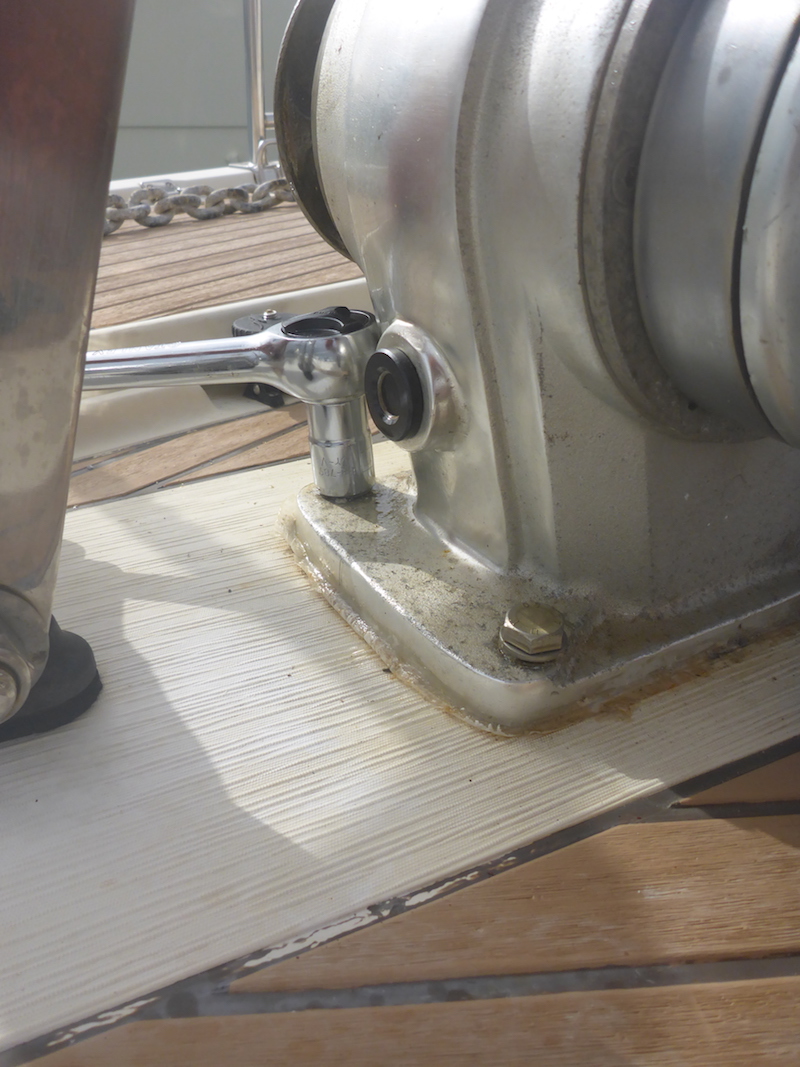
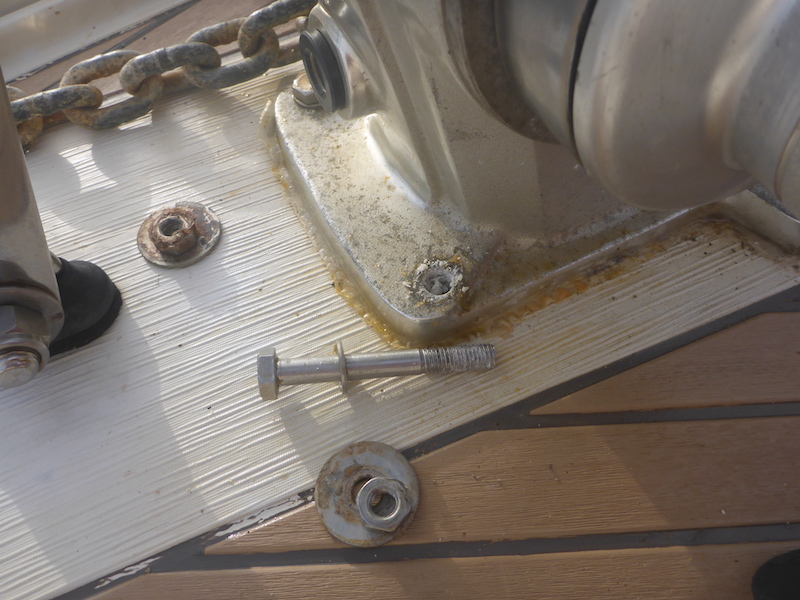
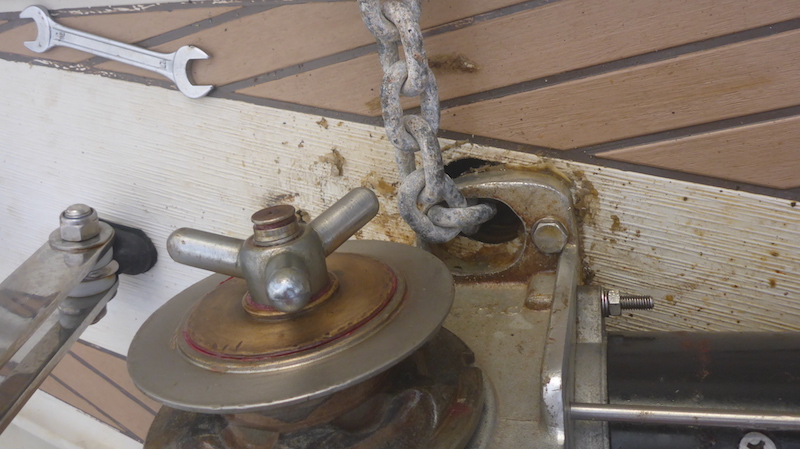
Picture 8
Now loosing the bolt holding the windlass from the deck

Picture 9
So far easy

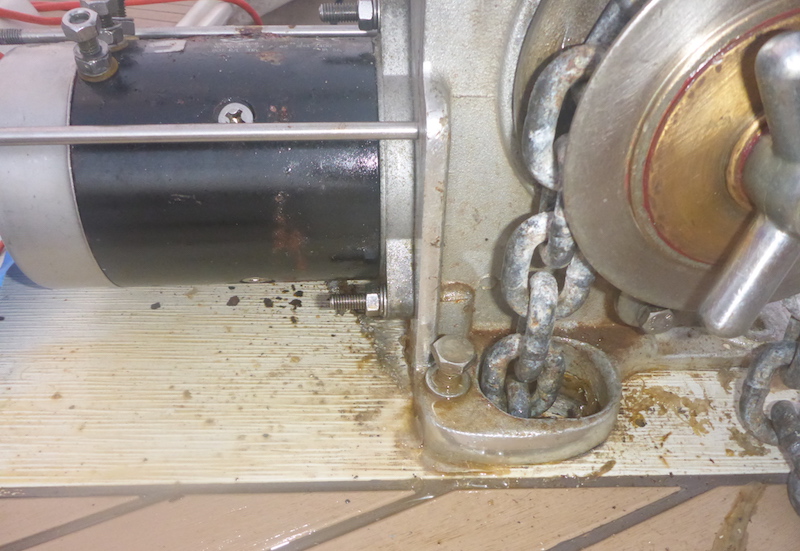
Picture 10
All going well
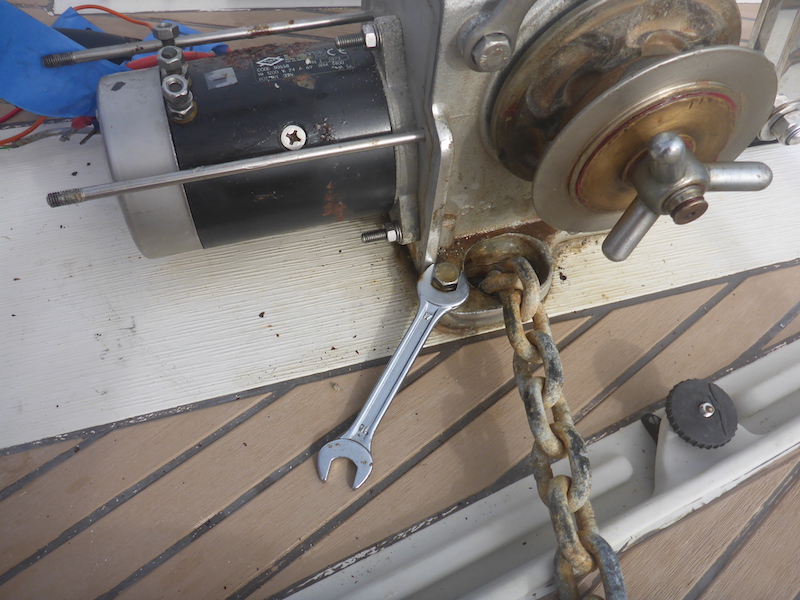
Picture 11
Socket will not fit - so use a wrench, but the bolt will not move
Note: this particular bolt will take me 4 hours to remove, here is how I did:
Note: during the whole process, I constantly apply penetrating oil (ZEP 45) and tries to unbolt it
Also used a hammer on top to try to loose it
Picture 12
I removed the other bolt
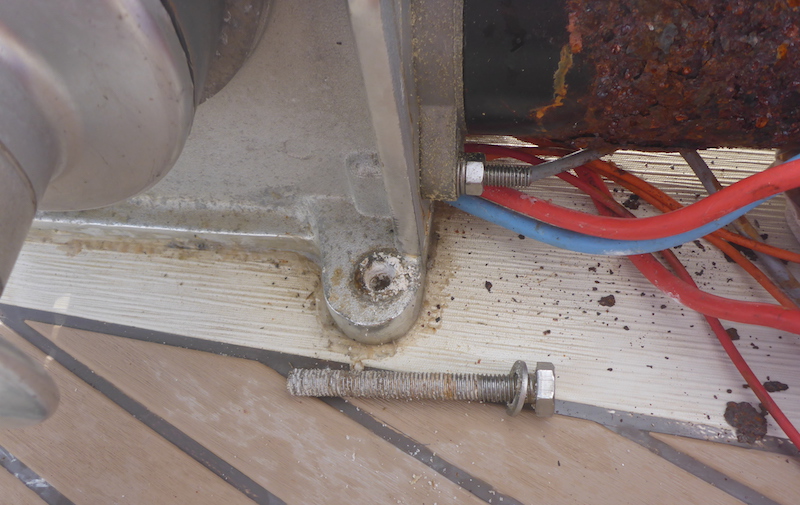
Picture 13
Accessing from the Port bow storage, you can see 3 nuts and washers
Note the right/aft nut and washer is removed already (yellow arrow)
Picture 14
I had to first remove the nut and washer in the bow storage to remove completely the bolt
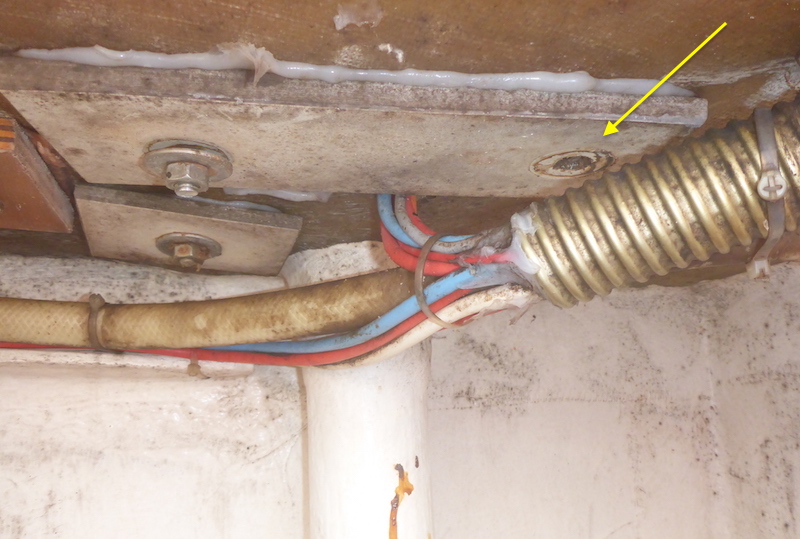
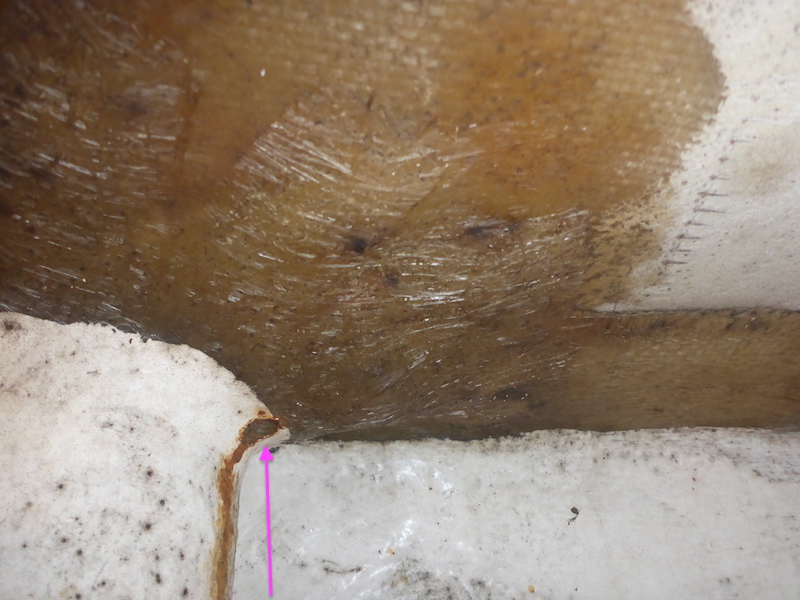
Picture 15
Unfortunately, on the stuck bolt there is no access to the nut as it is fiberglassed in... (Pink arrow)
Note: you can see some rust that went through
Picture 16
With screw driver I put some play
Picture 17
slowly was able to move side to side (really rotate around the stuck bolt) the windlass
Picture 18
Unlike what I was expecting, the bolt was turning "with" the windlass.
So it was not stuck in the nut at the bottom, but stuck in the windlass at the top
Picture 19
I secure the windlass back in place (using screw driver where the bolt were)
and added more and more penetrating oil, I also filled a little the windlass to be able to hammer in a socket
4 Hours after picture 11, the bolt is slowly getting loose
I later realize it was stuck because of "salt" built up
Picture 20
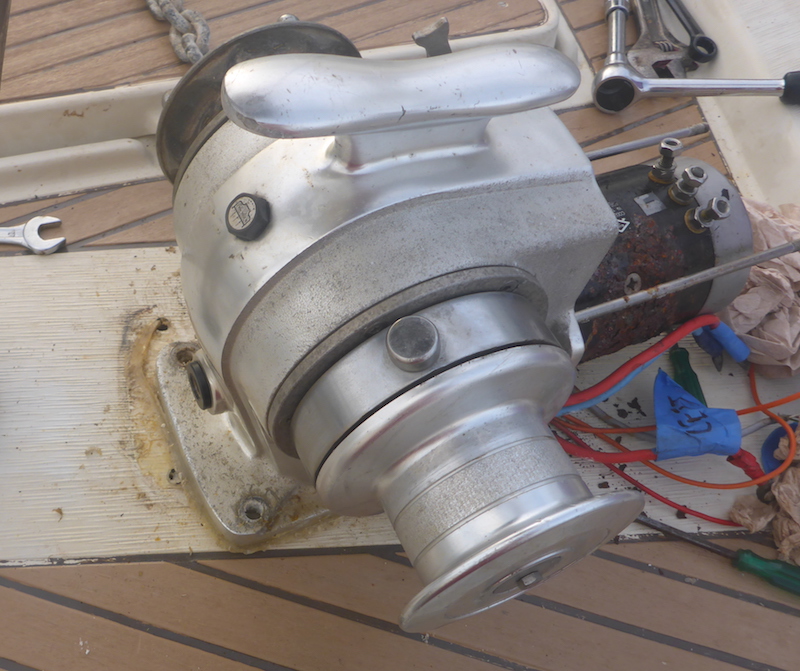
Finally it is off
Picture 21
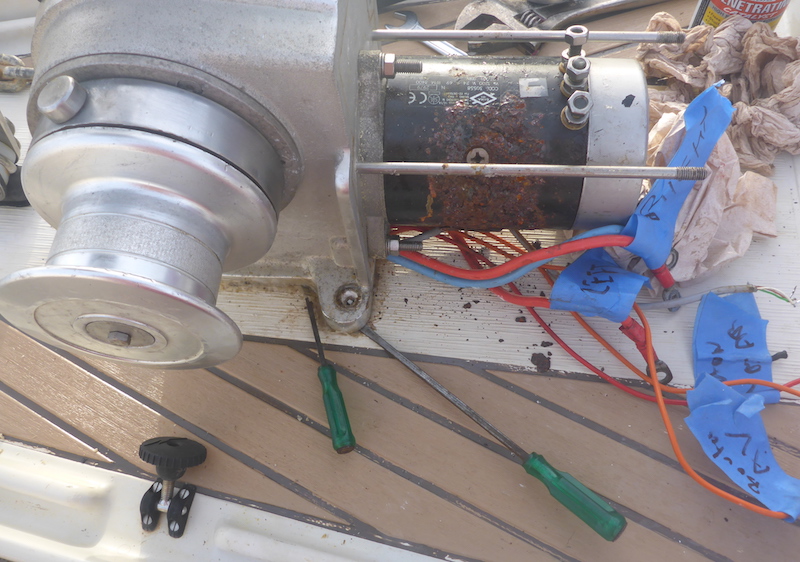
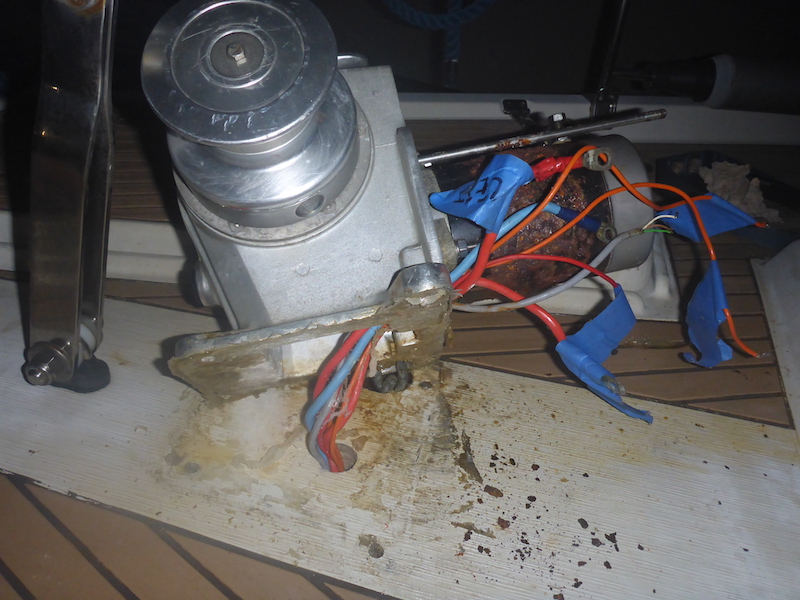
remove the wires
Picture 22
Protect the wires in plastic bags (I put 3 bags, each tape individually)
During the re-installation, I attach the chain to a fishing line
Much easier to manage than the heavy chain
Because of the stuck bolt, this whole process took 5 hours

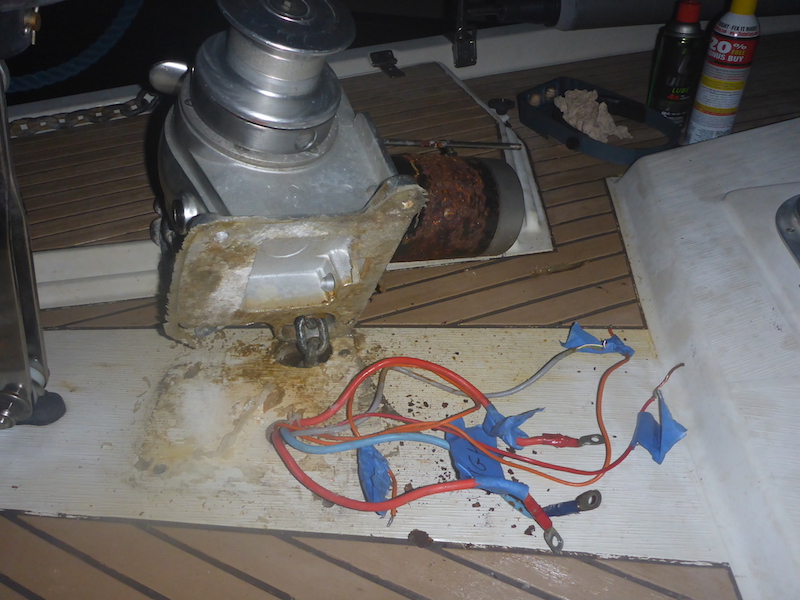
Picture 23
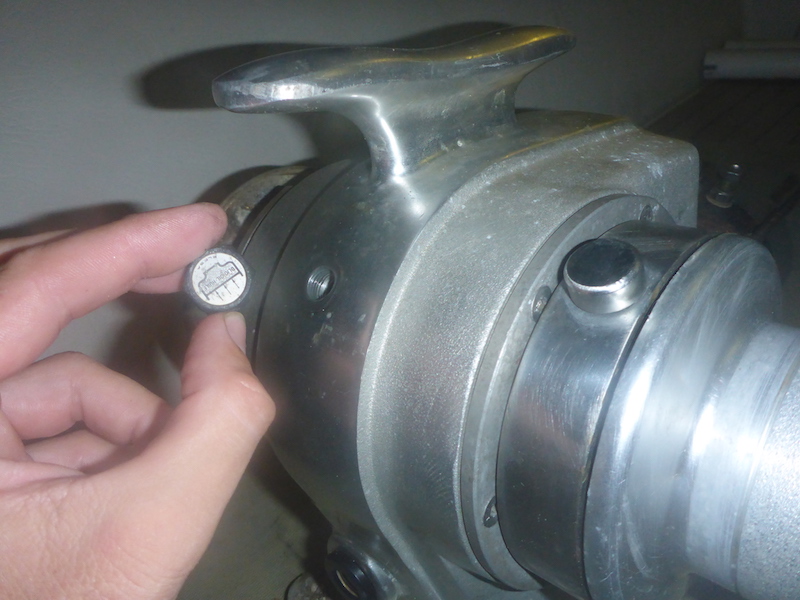
Remove the oil filler cap
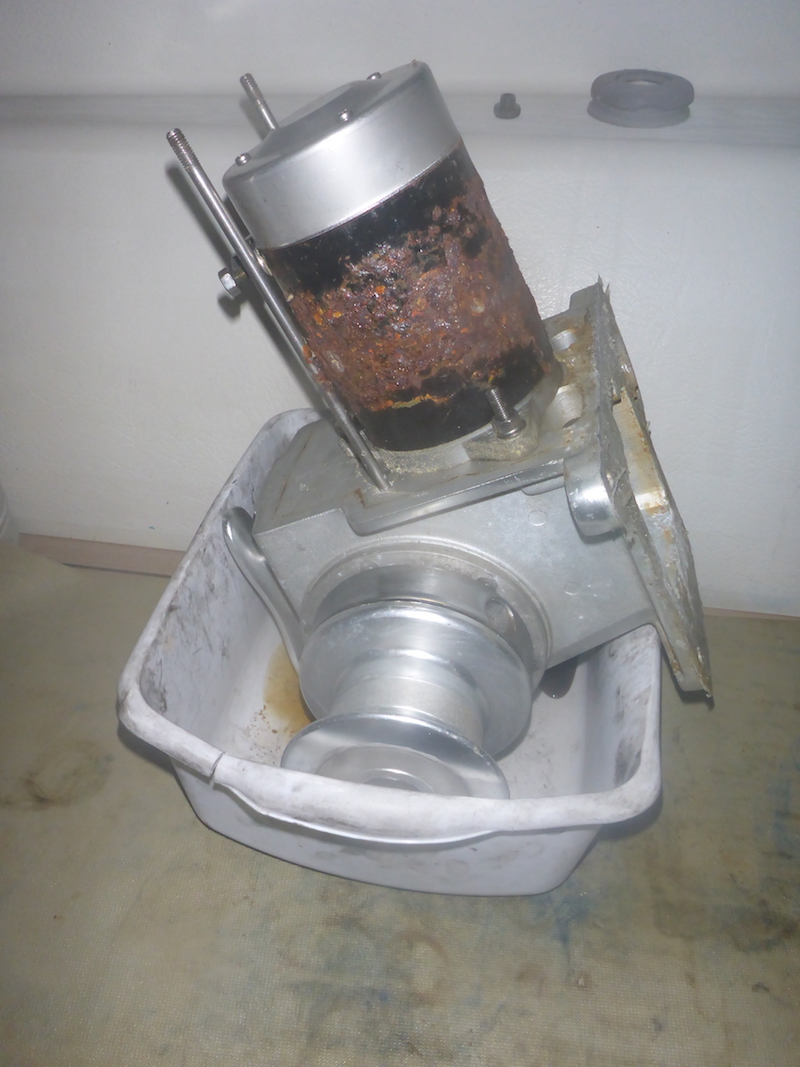
Picture 24
put upside down the windlass to let overnight the oil go
|
Next: Part 3
|
|
Part 1 10 Pictures from 01 to 7
Part 2 17 Pictures from 8 to 24
Part 3 8 Pictures from 25 to 32
Part 4 15 Pictures from 26 to 40
Part 5 8 Pictures from 41 to 48
Part 6 7 Pictures from 49 to 55
Part 7 13 Pictures from 56 to 68
Part 8 5 Pictures from 69 to 73
Part 9 10 Pictures from 74 to 83
Part 10 4 Pictures from 84 to 87
Part 11 7 Pictures from 88 to 94
Part 12 6 Pictures from 95 to 100
Part 13 8 Pictures from 100 to 107
Part 14 6 Pictures from 108 to 114
Part 15 15 Pictures from 115 to 129
Part 16 16 Pictures from 130 to 145 |
Part 17 3 Pictures from 146 to 148 Putting key back on Electric motor shaft
Part 18 8 Pictures from 149 to 156
Part 19 12 Pictures from 157 to 168
Part 20 9 Pictures from 169 to 177
Part 21 16 Pictures from 178 to 193
Part 22 15 Pictures from 194 to 208
Part 23 19 Pictures from 209 to 217
Part 24 20 Pictures from 218 to 239
Part 25 5 Pictures from 240 to 244
Part 26 3 Pictures from 245 to 247
Part 27 6 Pictures from 248 to 253
Part 28 4 Pictures from 254 to 258
Part 29 7 Pictures from 259 to 266
Part 30 12 Pictures from 267 to 278
Part 31 16 Pictures from 279 to 294
Part 32 6 Pictures from 295 to 300
|